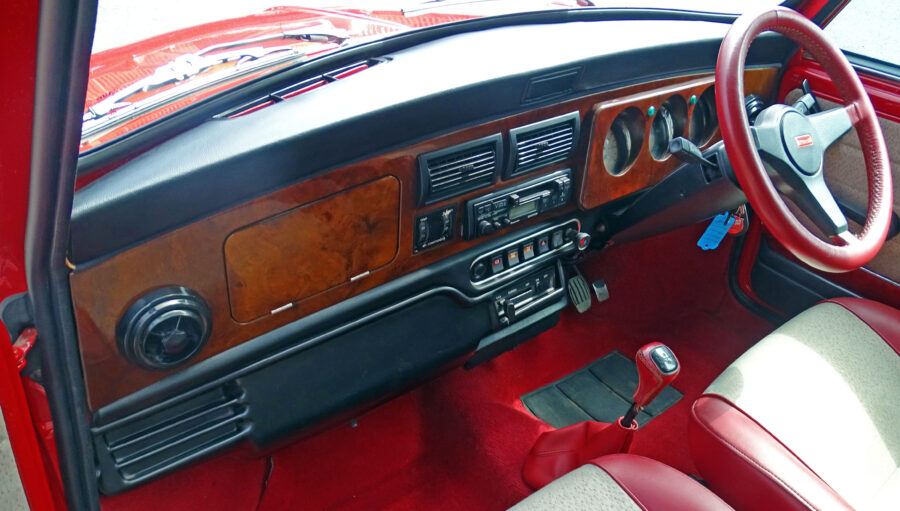
Your Mini Dashboard (also known as the Dash, Instrument Panel, or Fascia), is the control panel for your car. Set in the front of your Mini's interior, the dashboard holds all your Mini's instruments. Depending on the dashboard you have, you may find a variety of gauges, including the speedometer, fuel, tachometer, oil pressure & water temperature gauges.
Perhaps worth considering as the focal point of your interior, the Mini Dashboard can make (or break!) the look of your Mini... With so many options on the market. For instance, alloy, walnut, vinyl and charcoal finish with chrome rings for left hand and right hand drive Model Minis. To sum up, it's worth knowing that you can change your Mini's dashboard to one of these many options, should you choose to!
We've tasked our Sales Manager Mick on coming up with a brief guide on how he would set about changing a standard Mini dash:
Fitting a burr walnut or charcoal Mini dashboard :-
Later Mini with instruments in front of the driver :-
 Firstly, disconnect the battery.
- Remove the instrument cluster, disconnect the speedo cable and instrument wiring plug.
- Remove the instrument mounting bracket from the firewall.
- Unclip and remove the fresh air vents from the firewall.
- Remove the casing and shroud of the instrument cluster.
- Cut off the indicator warning light tubes level with the rest of the cluster.
- Remove the instrument binnacle from the new dashboard
- Attach the instrument cluster to the back of the instrument binnacle.
- Fix the fresh air vents to the new dashboard
- Fit two vent extension tubes ( CZH700 not supplied ) to the adaptors on the fire wall to allow the fresh air vents to connect
- After that, remove the mounting brackets and fixings from the new dash
- With the instrument binnacle still removed, fit the dashboard to your Mini, use the glove box, stereo and instrument apertures for access to the mounting points, ensure that the fresh air vents are connected correctly, fit the mounting brackets and tighten the dashboard against the upper and lower padded dash rails.
- Offer up the instrument binnacle allowing access to re-fix the instrument wiring and speedo cable.
- Secure the instrument binnacle via the stereo aperture
- Reconnect the battery
- Check operation of the instruments all warning lights, dash illumination and operation of the speedo
Instruments in the centre of the dash :-
One piece dash
 Firstly, disconnect the battery
- Remove the instrument assembly from the firewall
- Disconnect the speedo cable and wiring – mark the wires so they go back in the correct order
- After that, remove the fresh air vents as above
- Remove the new instrument binnacle from the dash and attach the instrument cluster to the back of the binnacle
- After that, fit the fresh air vent extension tubes as above
- Fit the fresh air vents to the new dashboard
- Next, fit the dashboard to the mini as above ensuring the air vents are correctly connected
- Fix the instrument binnacle to the dashboard once the speedo cable and wiring has been reconnected
- Secure the instrument binnacle via access from the glove box apertures
- Reconnect the battery
- Check operation of the instruments, warning lights and illumination
It's worth noting that each Mini Dashboard is different. Consequently leading to different fitting steps, however, we hope this blog will help give an understanding of the basic steps! They can be adjusted to fit any dash, but if you're struggling please get in touch with us.